It has been another long and productive week here at U.S. Water Rockets. We have been working very hard trying to solve a few problems with our Project 3000 design and have made some excellent progress. We will not know for sure if our situation has been corrected completely until our next launch day, which may be this weekend if the weather forecast holds true.
You can expect full details of our progress in an upcoming installment of our video log series, as we have taken a great deal of imagery and video footage of the progress as we move along.
Meanwhile, we are continuing to refine our launcher tutorial and this week we will be picking up where we left off in our last part of this series where we had just completely painted the wooden parts of the launcher with a product called "Aero Gloss", which is a wood sealer made for modeling applications. This stuff is awesome because it seals wooden pieces and prevents the grain from absorbing paint. The end result is a perfectly smooth finish.
Even if you are not building a launcher like this one, you will be able to make great use of this product because it can be used on any wooden part of your rocket and will allow you to make it perfectly smooth and really look great with the methods we explain here. For example, we use this product also on our wooden nosecones and rocket fins, for really nice and perfect looking pieces.
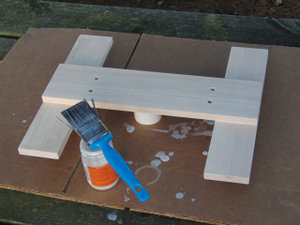
When we left off, we had painted the first coat of Aero Gloss on the launcher base, and we allowed it time to completely dry. According to the instructions, you should now sand the wood with fine grit sandpaper and smooth out the wood before the next step. We took progressive gains of sandpaper from 220 to 600 grit and sanded the base. When we were done we use a towel to wipe off the dust and then compressed air to blow off any remaining particles. We don't want dust to get trapped in our finish, so removing it is a good idea.

A second coat of Aero Gloss was applied to the base at this point. Things went pretty much the same way as they did with the first coat. We found that a good idea is to hang the pieces with a screw temporarily inserted into the hole made for the rubber foot is a nice way to suspend the part so that it can be painted with aero gloss in one coat all over instead of painting one side at a time. The screw in the foot hole can be used to hang the part from a string so that it does not touch anything and ruin the paint.

We actually took the precaution of doing a third coat of Aero Gloss sealer with rounds of sanding and cleaning in between the coats and following the last one, just to be on the safe side. Since this launcher is featured as the sample on our website, we figured we had better be 100% positive that the launcher was as defect free as humanly possible, so we went ahead and did the extra steps. It only added an extra day on the build because we allowed for the final coat of Aero Gloss to dry between the coats and the extra sanding certainly can only make things smoother. While drying out the launcher base, we were able to go to Wal*Mart and pick out a nice bright yellow color for the base color. We thought that the color would look good when combined with the other colors we have planned and would be bright enough to act as a safety precaution as well. We even got "FREE 33% More" paint!

We hung the base up by the screw once more and began applying coats of the yellow paint. Avoid the temptation to douse the whole object with paint because the technique of using many thin coats will produce a much nicer result. It will take longer, but it insures that the paint never becomes too thick to cure properly in the time allotted in the instructions. It also helps produce an even coat without any runs or drips.
We had a small problem in that a little flying insect decided to land on the fresh paint and walk around before being overcome by the fumes but not before leaving footprints as well as his feet, legs, and body stuck in the paint. Having done several thin coats at that time we were able to sand off his handiwork (or footiwork) without cutting through the paint and add another coat on top. The damage is completely fixed now. So remember the benefits of many light coats!

One final thing we discovered was that spray painting the hanging base was not as easy as brush painting it. The spray causes the base to begin to spin around due to the pressure of the paint hitting it. We came up with another idea, going back to painting the bottom side first and then inserting four screws into the leg holes and flipping the base over and standing it on the screws so no paint touched anything, then painting the top side. This worked very well, and we found that painting the base while sitting horizontal was easier to do and that gravity assistance helped get the paint layers on easier. We will remember this in the future.
We are letting the paint cure fully for a few days so we will be back collecting data for Project 3000 in the nice weather. This will give us some more multimedia for our future videos and make sure this paint is not going to be tacky when we go to finish the base build next week.
Thanks again for joining us. See you next time!


No comments:
Post a Comment